Physical Address
304 North Cardinal St.
Dorchester Center, MA 02124

Stunning news, Android 4.0 aka Ice Cream Sandwich has arrived on the HP TouchPad care of our friends at CyanogenMod. They did it for Gingerbread aka Android 2.3 and now the tablet-designed Android 4.0 has arrived in the shape of CyanogenMod 9. The even better news is that it’s brilliant!
The crowds roar and then they ask, how does this work again? Let’s take you through getting Android up and running on your HP TouchPad. If you’ve followed any of our guides to doing this for previous releases of CyanogenMod then you’ll be an old hand at it.
As with the original CyanogenMod 7 release Google Android Market doesn’t function correctly. This needs to be installed separately from a GAPPS build that we explain over here. Also currently there’s no mass-storage driver for ICS, so you won’t be able to access your HP TouchPad via a computer.
It has also been suggested that people having issues may want to consider wiping their HP TouchPad‘s and performing a clean install with the latest firmware, EAT has covered this previously as part of the removal process just jump to Step 4 and get going.
UPDATE: There’s a system UI update to try and fix a number of crashes available from here. This is installed via the Clockwork Recovery update system.
UPDATE 2: The initial alpha is up to version 2.0 0.6 that seems to address many of the minor issues.
UPDATE 3: To get the USB connection working once ICS is installed, select Settings > Storage in the top right you’ll spot the new three-dot menu button, click this and select USB Connection. A new selection will appear, choose Media device (MTP) and it should now appear as the regular USB device you know and love.
UPDATE 4: Once up and running we’re recommending you try switching to the Nightly Builds. These offer way better battery life and Android 4.0.4, plus microphone support should be in there by this point.
This is alpha software that “roots” your hardware, this will not only invalidate the warranty but could also lead to your device becoming unusable. You do so at your own risk and there’s no way to easily remove this installation. So there. You must also back up all of your HP TouchPad documents, music, books and media. Our experience is the upgrade from an existing installation is smooth and keeps all of your installed apps, files and details.
It’s important that you have 2GB of free space on your HP before proceeding, so do what you have to remove unneeded files. A number of files are required to make this work, the CyanogenMod Android ROM. The ACME installer. A mulit-ROM loader. The Clockwork recovery ROM and finally the HP/Palm Novacom driver from its SDK. We list where to all of these below and recommend you get all of them before proceeding and don’t extract them just yet.
Grab the ACMEinstaller2
Grab the Clockwork Recovery ROM
Grab the Alpha 2.0 build
Download each of these files and check they have fully downloaded correctly.
The Moboot bootloader is available from its Google Code site
The HP webOS SDK is available for Windows, Mac and Linux
Alternatively use the Universal Novacom Driver installer

If you’ve installed previous versions of CyanogenMod you can jump to step 4. You don’t need to install the entire SDK for Windows users, at least, start the install but choose a Custom installation and select the PDK Toolset only. Finish the install process. Alternatively use the Universal Novacom Driver installer

Boot the HP TouchPad in WebOS, connect it to your PC via USB and select USB Drive. Open the My Computer, locate and open the HP TouchPad and in the root create a folder called cminstall into this copy the unextracted Zip files for Moboot, Clockwork and CyanogenMod.

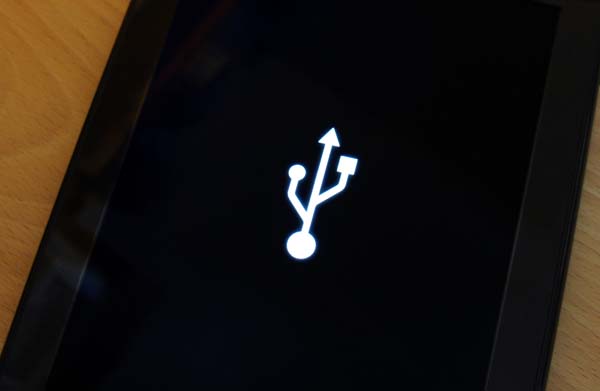
Once copied eject the HP TouchPad and reboot it, once it has shutdown turn it on holding the up-volume button. A large white USB symbol will appear on the screen. Reconnect it to your PC using the USB cable. If Novacom was correctly installed the driver will be automatically detected and installed.
Make sure the ACMEInstaller2 file is on your desktop. Open the Start menu, type CMD and press return. At the command prompt change directory to the desktop by typing CD desktop and press return. To initiate the Android install type the following line into the command prompt and press return, cross your fingers and wait five minutes.
novacom boot mem:// < ACMEInstaller2

The system will automatically reboot. You’ll briefly see the new boot menu with CyanogenMod, WebOS and Recovery options but it will then proceed on to Android. Hurrah! On the whole we’ve found this alpha to be exceptionally well behaved, the main issue for us is if the tablet goes to sleep you’ll need to disable and re-enable the Wi-Fi device via Settings.
If you’re experiencing issues, we’ve started a HP TouchPad Recovery feature and an uninstall guide using the ACMEUninstaller tool.
